

Connect with Warid
Let your users connect their Warid to your app with one button.
Warid puts a business's WhatsApp, Instagram and Messenger conversations in one inbox, with an AI agent that answers customers. "Connect with Warid" works like "Sign in with Google": your user clicks a button, approves, and your app gets a token for their workspace. With it you can read and answer their conversations, and open their Warid dashboard without asking them to log in again.
Send them to the consent screen
Your app opens Warid's authorize URL in a popup or a redirect, with a PKCE challenge and a random state.
GET https://warid.chat/oauth/authorize ?response_type=code&client_id=mci_... &redirect_uri=https://yourapp.com/callback &scope=conversations:write agent:write &state=RANDOM&code_challenge=...&code_challenge_method=S2561. Create your app
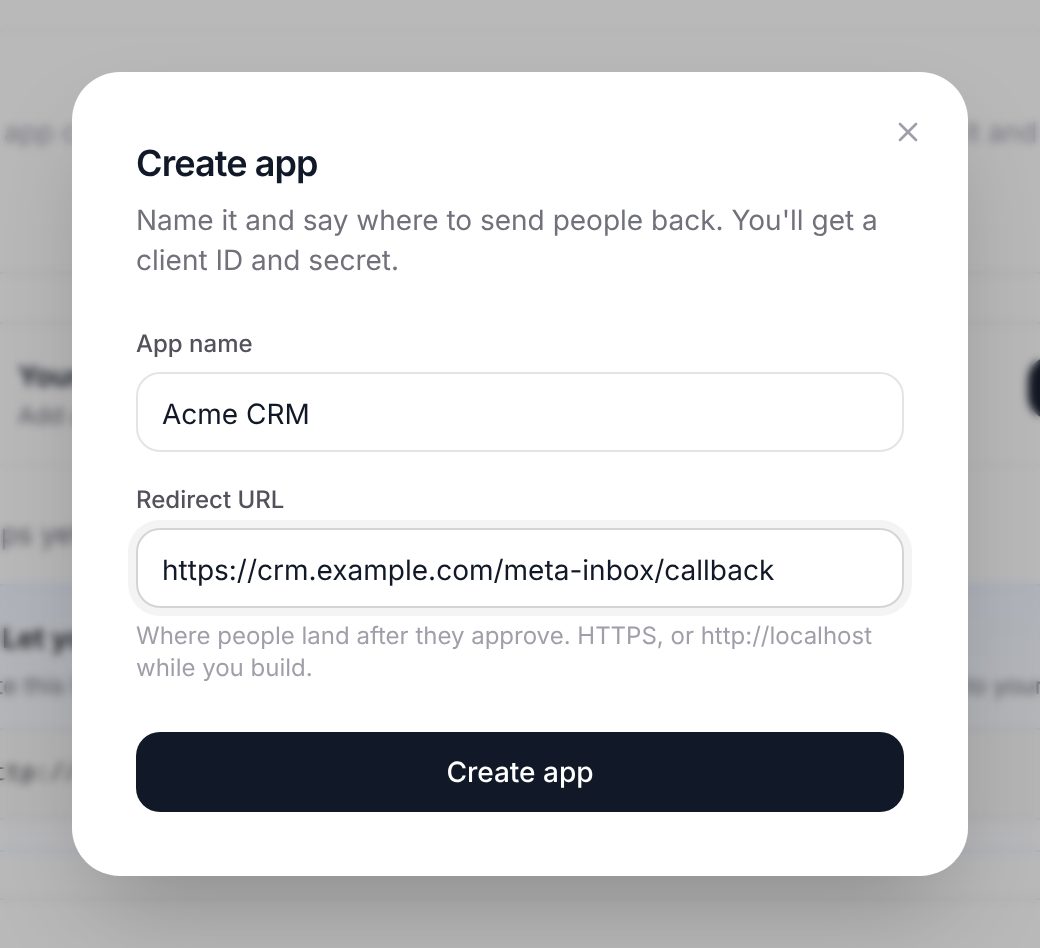
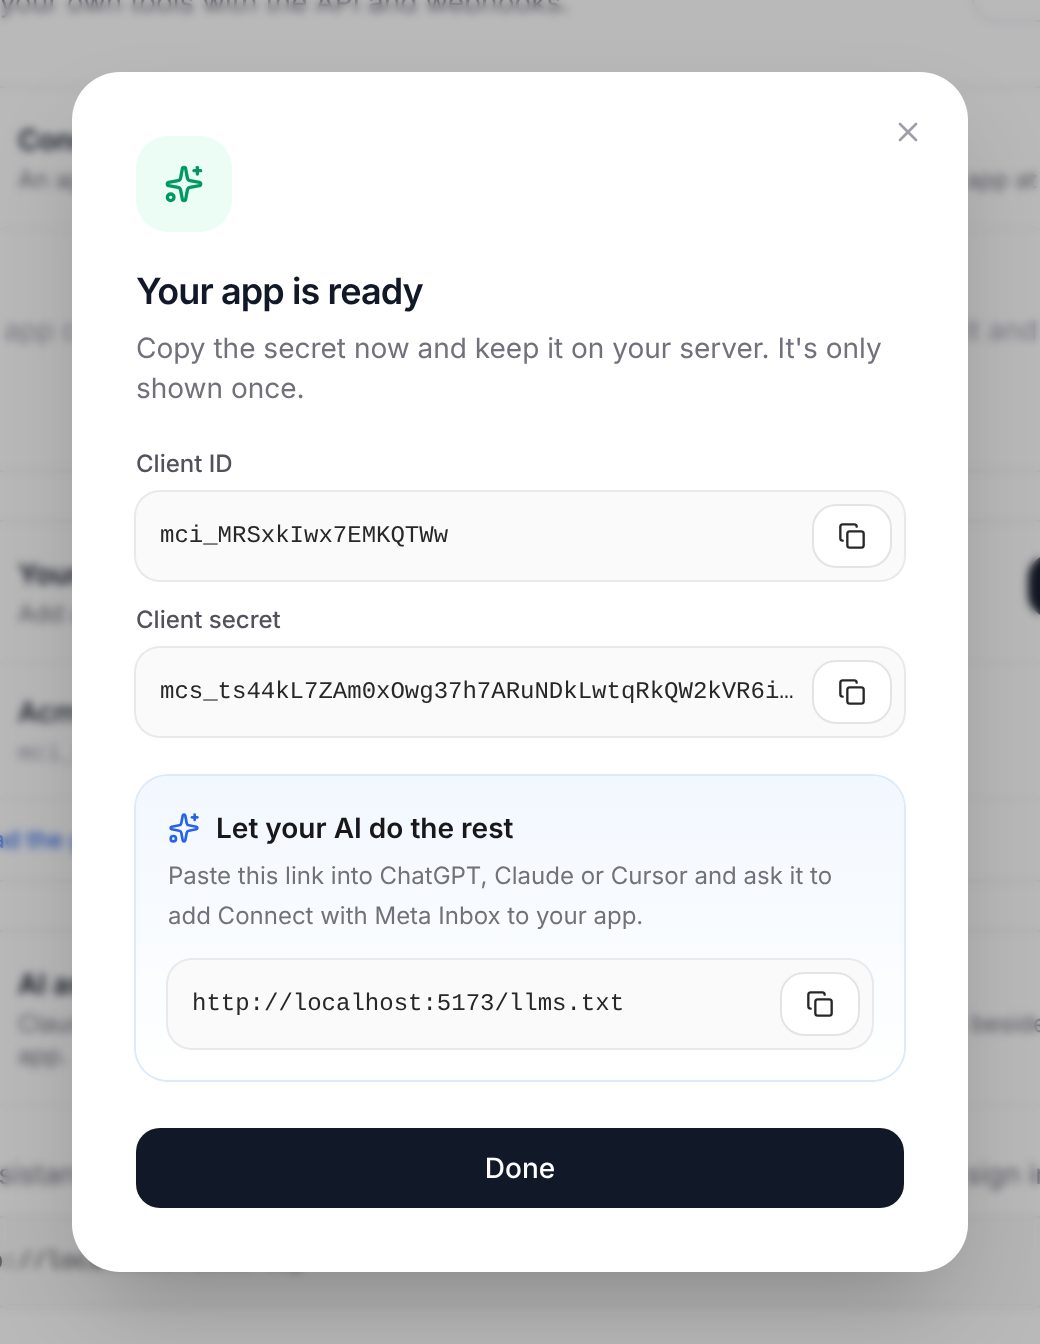
In Warid, open Developers and click Create app. Pick a logo (or upload yours), then enter a name and your callback URL, the page people return to after they approve. You get a Client ID (mci_…) and a Client secret (mcs_…). The secret is shown once; keep it on your server.
2. Add the button
When the user clicks your "Connect with Warid" button, make a random state and a PKCE code_verifier, save both in their session, and send them to:
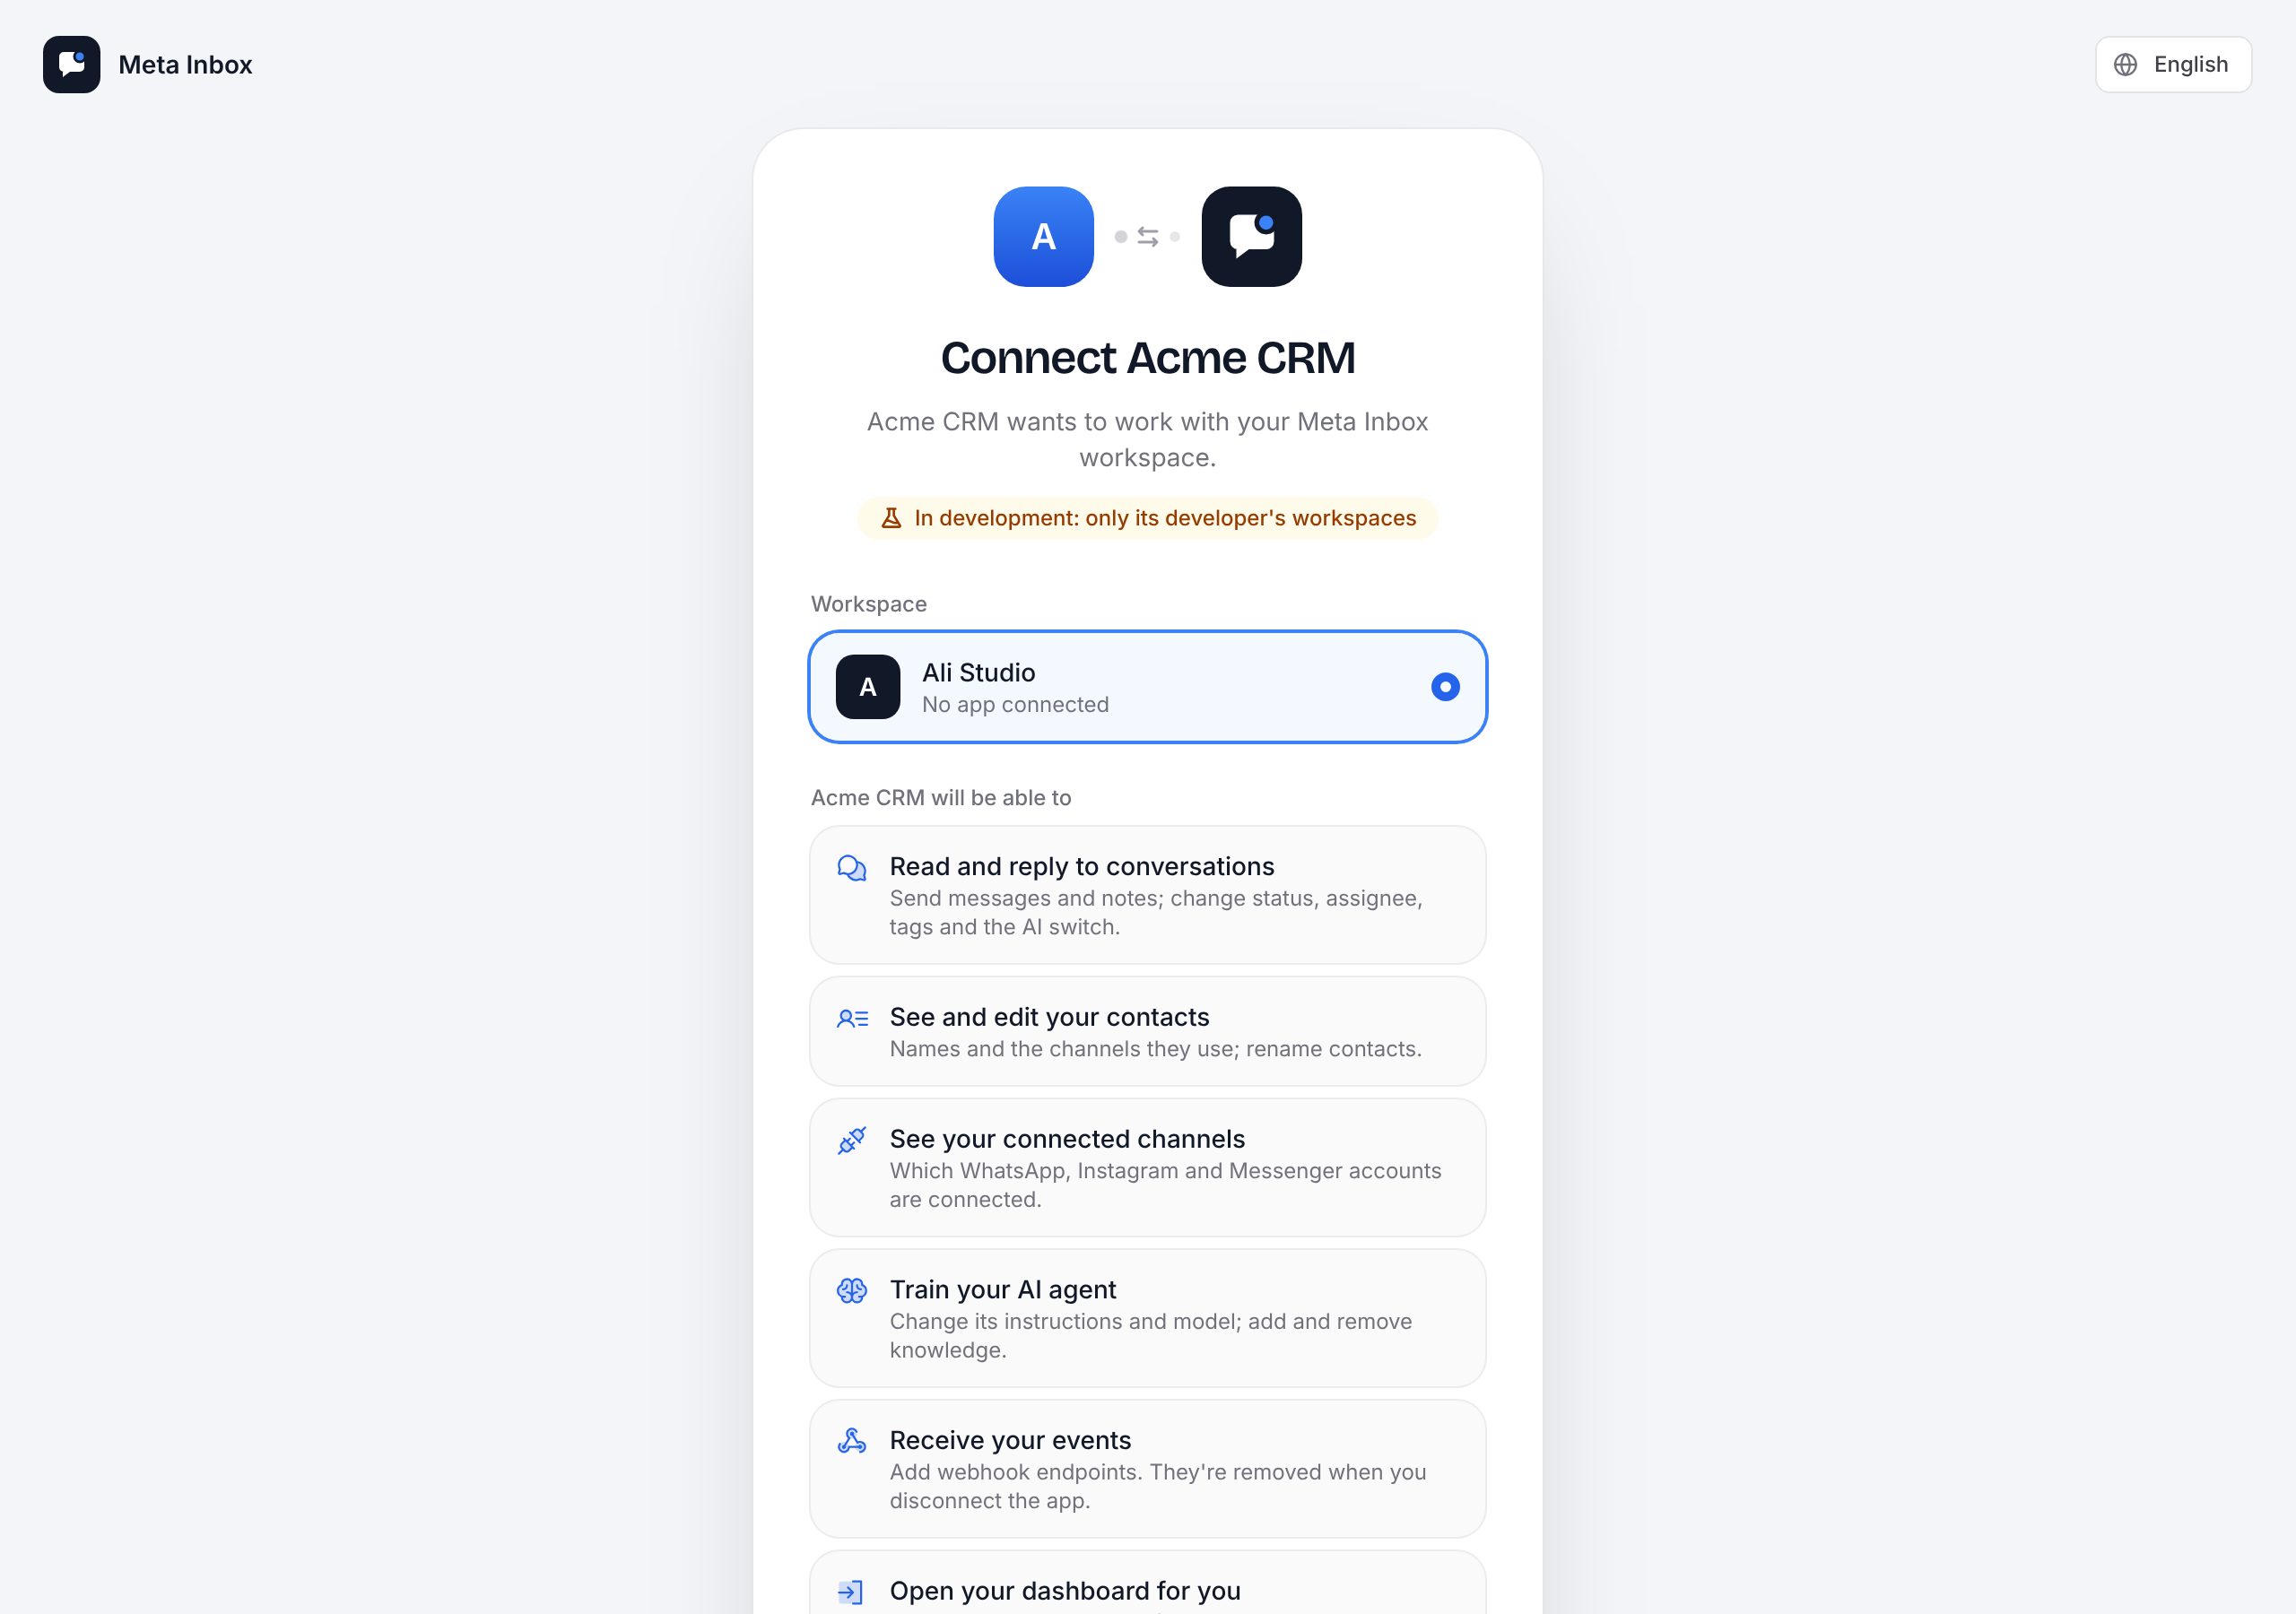
https://warid.chat/oauth/authorize ?response_type=code &client_id=YOUR_CLIENT_ID &redirect_uri=https://yourapp.com/warid/callback &state=RANDOM_STATE &code_challenge=BASE64URL(SHA256(code_verifier)) &code_challenge_method=S256They sign in to Warid (or sign up), pick their workspace and approve. Leave out scope to ask for everything your app is enabled for, or pass a space-separated list from the table below.
3. Handle the callback
We send the browser back to your redirect_uri with ?code=…&state=… (or ?error=access_denied). Check that state matches, then swap the code for tokens from your server within 60 seconds:
curl -X POST https://api.warid.chat/oauth/token \ -d grant_type=authorization_code \ -d code=THE_CODE \ -d redirect_uri=https://yourapp.com/warid/callback \ -d code_verifier=THE_VERIFIER \ -d client_id=YOUR_CLIENT_ID \ -d client_secret=YOUR_CLIENT_SECRET{ "access_token": "mat_...", "token_type": "Bearer", "expires_in": 3600, "refresh_token": "mrt_...", "scope": "conversations:read conversations:write ...", "workspace_id": "b5d3d605-c177-418a-8e46-acd8c6e9c6f8"}Save both tokens with your user. The access token lasts an hour. Get a new pair with grant_type=refresh_token&refresh_token=mrt_… (plus your client ID and secret); each refresh token works once.
4. Call the API
Send the access token as a Bearer token. Everything is under https://api.warid.chat/api/v1.
# Their conversations, newest firstcurl https://api.warid.chat/api/v1/conversations -H "Authorization: Bearer mat_..." # Reply in onecurl -X POST https://api.warid.chat/api/v1/conversations/CONVERSATION_ID/messages \ -H "Authorization: Bearer mat_..." -H "Content-Type: application/json" \ -d '{"text": "Your order has shipped!"}'Send messages covers the 24-hour rule, images, WhatsApp templates and verification codes. The API reference lists every endpoint. The OpenAPI document is at https://api.warid.chat/docs/json.
5. Open their dashboard
To send your user into Warid already signed in, ask for a sign-in link when they click, then redirect them to it. A link works once and expires after two minutes, so make a new one on every click.
curl -X POST https://api.warid.chat/api/v1/sign-in-links \ -H "Authorization: Bearer mat_..." -H "Content-Type: application/json" \ -d '{"path": "/inbox"}'{ "url": "https://warid.chat/auth/link#token=msl_...", "expiresAt": "2026-10-15T12:02:00.000Z" }path can be /inbox (the default), /inbox/CONVERSATION_ID, /agent, /channels, /team or /developers. The link signs in the person who connected your app.
Full example
A complete server in one file: the button, the callback, an API call and the dashboard link. Set CLIENT_ID, CLIENT_SECRET and REDIRECT_URI in the environment.
import express from "express";import session from "express-session";import { createHash, randomBytes } from "node:crypto"; const APP = "https://warid.chat";const API = "https://api.warid.chat";const { CLIENT_ID, CLIENT_SECRET, REDIRECT_URI } = process.env; const app = express();app.use(session({ secret: "change-me", resave: false, saveUninitialized: true })); // 1. The "Connect with Warid" button links here.app.get("/warid/connect", (req, res) => { req.session.state = randomBytes(16).toString("hex"); req.session.verifier = randomBytes(32).toString("base64url"); const challenge = createHash("sha256").update(req.session.verifier).digest("base64url"); const url = new URL(`${APP}/oauth/authorize`); url.search = new URLSearchParams({ response_type: "code", client_id: CLIENT_ID, redirect_uri: REDIRECT_URI, state: req.session.state, code_challenge: challenge, code_challenge_method: "S256", }); res.redirect(url.toString());}); // 2. Warid sends the user back here.app.get("/warid/callback", async (req, res) => { if (req.query.error || req.query.state !== req.session.state) return res.status(400).send("Not connected"); const tokens = await fetch(`${API}/oauth/token`, { method: "POST", body: new URLSearchParams({ grant_type: "authorization_code", code: req.query.code, redirect_uri: REDIRECT_URI, code_verifier: req.session.verifier, client_id: CLIENT_ID, client_secret: CLIENT_SECRET, }), }).then((r) => r.json()); req.session.warid = tokens; // Save with your user in your database. res.redirect("/");}); // 3. Use the API.app.get("/warid/conversations", async (req, res) => { const data = await fetch(`${API}/api/v1/conversations`, { headers: { Authorization: `Bearer ${req.session.warid.access_token}` }, }).then((r) => r.json()); res.json(data.items);}); // 4. "Open Warid": straight into their dashboard.app.get("/warid/open", async (req, res) => { const link = await fetch(`${API}/api/v1/sign-in-links`, { method: "POST", headers: { Authorization: `Bearer ${req.session.warid.access_token}`, "Content-Type": "application/json" }, body: JSON.stringify({ path: "/inbox" }), }).then((r) => r.json()); res.redirect(link.url);}); app.listen(3000);Permissions
| Scope | Lets your app |
|---|---|
conversations:read | List conversations and read messages |
conversations:write | Send messages and notes; change status, assignee and tags |
contacts:read | Read contacts |
contacts:write | Rename contacts |
channels:read | See the connected WhatsApp, Instagram and Messenger accounts |
agent:read | Read the AI agent's settings and knowledge |
agent:write | Change the AI agent's instructions and knowledge |
webhooks:read | List webhook endpoints |
webhooks:write | Add and remove webhook endpoints |
templates:read | List WhatsApp message templates and their review status |
templates:write | Create and delete WhatsApp message templates |
otp:send | Send verification codes on WhatsApp and check them |
dashboard:open | Open the dashboard for the person who connected the app |
Good to know
- Testing. A new app connects only to your own workspaces. When it's ready for everyone, open it in Developers and click Submit for review.
- One app per workspace. A workspace connects one app at a time. The business sees your app's activity in Developers and can disconnect it there; your tokens then return
401. - Training the AI agent happens in the dashboard: businesses upload documents and write instructions in AI agent. Your app can link straight there with a sign-in link to
/agent. - Errors are JSON like
{ "error": "insufficient_scope", "scope": "agent:write" }. A401means the token expired (refresh it) or was revoked. Each connection gets 120 requests a minute. - Events. To hear about new messages instead of polling, add webhooks.